I'm generally a big fan of Google products including their free photo editing software, Picasa. I like the overview it gives me of all my photos.

Today, I'm going to give you a short tutorial on using Picasa for cross-referencing your photos. I'm going to use my cake photos as an example.

First, you'll need to download and install Picasa.

Download Picasa and install
Once that's done, you'll need to create a folder on your computer for your project in which you'll place all the relevant photos. In this case, I've placed all my cake photos in this new folder. It doesn't matter what the file names of your images are.

Cake photos gathered in one folder
Now to using Picasa. If you can't see the folder you've just created, click "Tools" and then "Folder administration". Locate your folder to the left and select it. Then click "Scan always" to the right.

Telling Picasa to always scan your new folder for images
You should now see thumbnails of your images in Picasa.

Now we're ready to tag the photos with descriptive words that will help you sort and find your images later. In this case, I'm tagging cake photos, so my tags will be something like: "cupcake", "flower", "three tier", and so on.

Image thumbnails in Picasa

To start tagging your photos, click the Tag icon at the bottom to open the Tag window to the right.

The Tag icon which opens the Tag window
Now, select one or more photos you would like to tag (you can hold down CTRL or SHIFT while selecting to select more than one photo). In the Tag window, type a tag you want to add to the photo(s). In this cake, I typed "cupcakes". Then click Enter.

Adding the tag "cupcakes" to selected photos

Repeat this process for all your photos. Time-consuming, yes I know, but it makes life so much easier later on when you want to find relevant photos.

Example of the tags I added to the cupcake with the purple flower

When you've finished adding all your tags, deselect any selected photos. You can now see a list of all the tags in your folder and how many photos have that tag (the number in the brackets).

Overview of the tags in my folder

Now, for the actual useful part - we are going to use our folder tags to find photos. Right click the tag you want to find photos by, and select "Search for items with this tag". Picasa now displays the relevant photos.

This doesn't sound like much, but if you like me have up to 1000 photos in the same folder, this is absolutely brilliant for searching and cross-referencing. This way, I don't have to decide whether a cake belongs in the "cupcake" or "wedding" folder - I can just add more tags to it.
My mom served these delicious pretty "medal" cakes at dinner this weekend and I thought I'd share the recipe (from Mette Blomsterberg at DR1 - Danish link).

Beautiful medal cakes
Ingredients for 10 cakes


Top and bottom cookies:
300 g flour
100 g powdered sugar
150 g butter at room temp.
1 egg

Vanilla pastry cream:
2½ dl milk
½ vanilla bean
35 g sugar
20 g corn starch
2 egg yolks

Frosting:
150 g powdered sugar
a little water

Decoration:
150 g strawberry jam
4 dl cream (for whipped cream)
Strawberries

Directions for cookies:
Mix all the ingredients together until it makes a smooth dough. Leave it in a cold place for about half an hour. Then roll the dough thin and cut out 20 circles (approx. 7 cms) using a cookie cutter or a glass. Bake the circles on baking sheet at 200 °C for 8-10 minutes. Let them cool off on a wire rack.

Directions for vanilla pastry cream:
Heat 2 dl of the milk in a sauce pan. Scrape out the vanilla seeds from the vanilla bean and mix them with the sugar so that the seeds are seperated. Mix the vanilla/sugar with corn starch and the rest of the milk. Finally, add the egg yolk and mix well. When the milk reaches boiling point, pour the mixed ingredients into the sauce pan. Mix consistently until the cream thickens, then pour the cream into a container and let it cool off in the fridge for at least two hours.

Directions for assembly:
Whip the cream to a nice, soft whipped cream. Put it in a piping bag with a star tip and spray around twice on each of the 10 bottom cookies. Place a teaspoon of strawberry jam in the middle of each whipped cream "ring". Fill the rest of the middle with pastry cream. Cover the top cookies with frosting and place them on the whipped cream/pastry cream filling. Finish off with some strawberry slices. Keep in the fridge until ready to serve!
I bought a drawer storage chest for all my jewelry stuff a while back and I'd sort of just dumped everything in there because I didn't have the time to organize it. But today was to be the day! So here are some tips for organizing your jewelry gemstones, beads, charms, etc.

Materials:
Drawer storage chest (available at most hardware stores)
Paper and tape or label paper
Pen or marker
Cardboard or dividers for the drawers
Small plastic containers or other (optional)

Directions:
Most of my gemstones and beads were already sorted into little bags, so I didn't have to do too much actual sorting. Good luck if your's is one big mess ;)  My stuff was just dumped into the drawers.
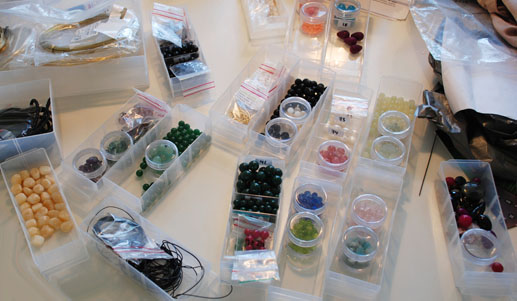
Complete gemstone chaos
First, sort your stuff into groups. I sorted mine according to their gemstone type and some by size. Put all your really small beads and gemstones in small plastic containers as the dividers for the drawers aren't always completely level at the bottom. I got my plastic containers at a jewelry supply store here in Copenhagen, but Firemountaingems (US) or CJ Beaders (UK) carry a very nice selection.

Next, label your containers. I labelled mine with numbers that fit with my stock supply list, but you can write whatever :)
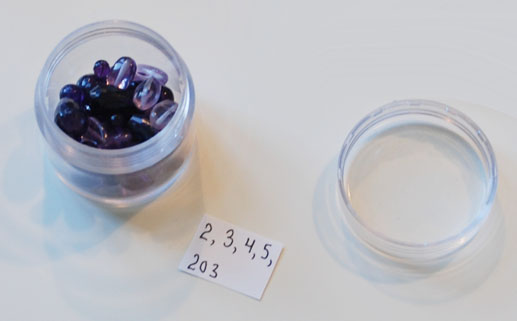
Labeling the amethyst gemstones in the plastic container
If you've used label paper, simply remove the label from the back sheet and stick it on your container. If you like me used regular paper, stick it on the plastic container with tape.
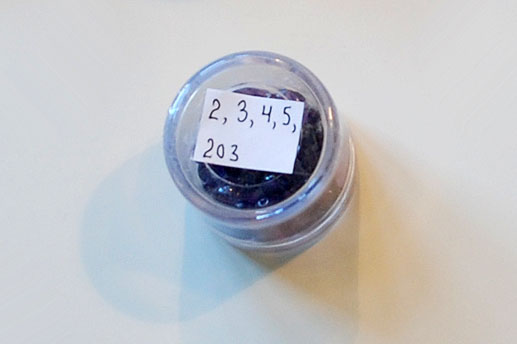
Labeled plastic container

Repeat this process until you've labelled all your plastic containers.

Next, place the larger gemstones and items in the drawers, using the dividers that (most likely) came with your  drawer storage chest. I ran out of dividers at one point and simply made my own out of thick cardboard. Label if necessary.
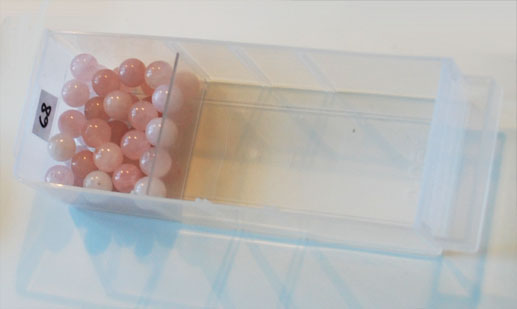
Labeled gemstones in drawer
Full jewelry drawer
If you plan to store silver or gold items in your drawers, remember that they will wear over time if they are not kept away from air, so put your charms, earrings and more in little plastic bags and seal tight. You can label these with a magic marker.
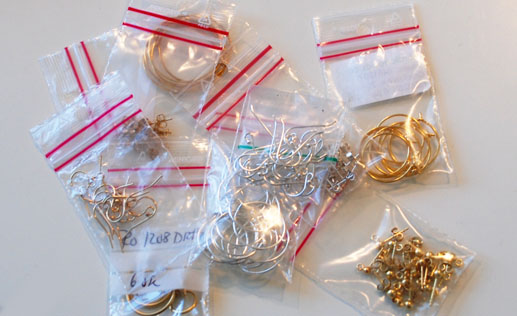
Gold and silver jewelry findings stored in small plastic bags
I like having a nice overview of all the small charms, o-rings and other stuff I have, so I keep most of my gold and silver findings in a see-through storage box. I got mine on eBay, but Firemountaingems has a nice selection of these.
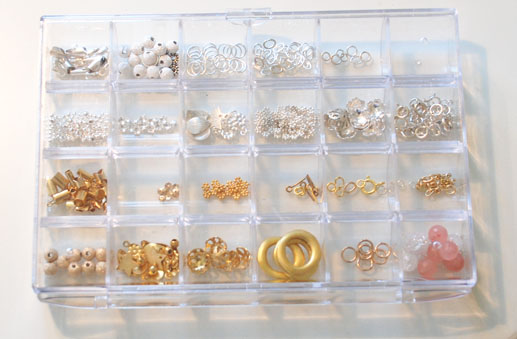
Gold and silver findings organized in see-through storage box
When you're all done sorting your items, cut out labels to stick to the front of the drawers. This way you can quickly find what you're looking for. Again, I had no labels, so I used paper and tape.
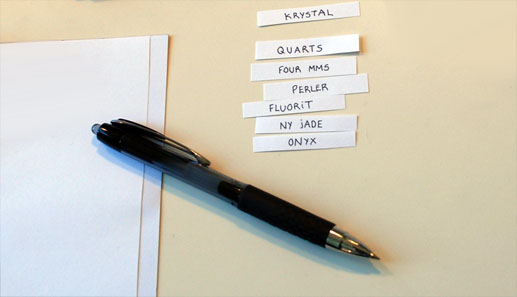
Writing labels in a wonderful mix of Danish and English
When you've finished all the labels, stick them on to the drawers, and you're done with your new jewelry storage drawer chest!


Here are some other tips for organizing your beads and findings:

I have a looot of swarovski beads, so I've chosen to group these in these brilliant Beadalon Stacking Containers. I've stuck labels with the color name at the bottom of these.
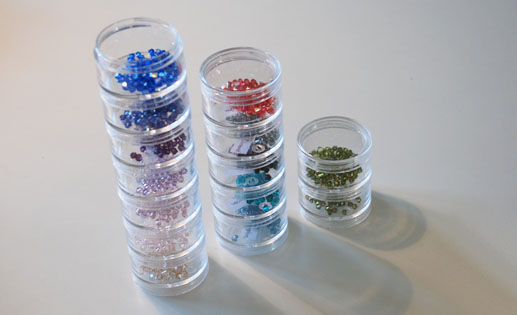
Swarovski in Beadalon Stacking Containers
I also have a lot of tools for making jewelry. I've organized these in these really cool (but expensive) plastic organizers from the Swedish company Ordning & Reda. The tall ones contain all my pliers, mandrels (most of which are home made by the way - just buy some smooth mandrels from your hardware store and label them with diameter size!), jewelry hammers, etc. I store all the rest like glue, jig, polishing cloth, etc. in the wider ones.
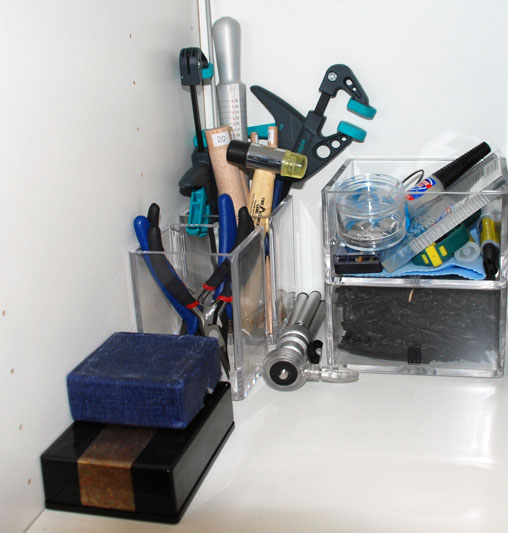
Organized jewelry tools
My organized jewelry closet!
Yesterday was my Dad's birthday. My sister and I gave him a gift card for his very own shopping trip with us (lucky him!) which I had put in this cute tie gift bag made from Kristen's template. See her DIY guide to make your own!


My Mom had made delicious Othello birthday cake (sorry about the quality of the cake photos - iPhone!). Yum yum yum! I'll post the recipe another day :)


This is one of my all time favorite desserts!

6 servings
Ingredients for ice cream:
350 g chopped pineapple
1 vanilla bean
100 g powdered sugar

Ingredients for oatmeal caramel cookies:
½ dl cream
½ dl sirup
125 g butter
175 g (2 dl) sugar
60 g (2 dl) oatmeal
125 g (2 dl) flour
½ tsp baking powder
1 tsp vanilla sugar

Directions:
Freeze the chopped pineapple until completely frozen (it takes approximately 3 hours).

Mix cream, sirup and butter together in a pan and melt at low temperature. Take the pan off the heat and add sugar, oatmeal, flour, baking powder and vanilla powder while stirring. Place small amounts of the mixture on the baking sheet at least 10 cm apart (when the cookies melt they become much flatter and larger). Bake the cookies at 200 ° C for 5-6 minutes.

Allow the cookies to cool off on the baking sheet before placing them on a wire rack to cool.

To make the pineapple sorbet "ice cream", cut the vanilla bean in half and scrape out the vanilla. Mix vanilla, frozen pineapple and powdered sugar in a blender at high speed until thick. Serve the sorbet in tall glasses with oatmeal caramel cookies and fruit.

Enjoy!
I usually have a bunch of greeting cards at the ready for parties, etc. I noticed we were running out, so I decided to make some. I hadn't painted with watercolor for quite some time, so I felt a bit rusty, but I think they turned out great!

Yay! New blog!

My intention is to share with anyone who cares the projects I get myself into, including home decor, painting, crafts, computer fun, jewelry making and much more :)